
The Perfect Vanilla Cake with Buttercream Frosting

Over the past few years, I have been on a search for the perfect vanilla cake recipe. One that is soft, light and fluffy; one that tastes as good as it looks, and one that you will make over and over again for years to come. How hard could it be, right?! And so the search began..Along the way, I was asked to make a wedding cake for a mutual friend in Charleston. Side note: I have a hard time saying no... I have made hundreds of cakes in my life but never a cake for someone to enjoy on as big and special of a day as their wedding! The couple decided on a 3-tiered, almond cake with almond icing (YUM). I thought about the wedding cake for weeks, drifting to sleep thinking of the process. I was most nervous about it being straight and centered, as I wanted it to be perfect for the sweet couple.I froze the cake layers a few days before assembling them, which made it much easier to frost and stack. I took it one layer at a time, and refrigerated each frosted tier separately before stacking. I placed thin wooden dowels in each tier to keep it stable, and the cake ended up being a success! Praise the Lord.I continued to perfect my vanilla cake recipe, grateful for the opportunity to make a wedding cake in the meantime. I hope you enjoy the recipe below! It certainly took time to develop, but I think you will find the finalized version to your liking— particularly light and fluffy.While making the wedding cake and this vanilla cake, I thought of some beginner tips I wanted to share with you on how to frost a cake. Keep in mind, I am a self-taught baker and have learned from many cake fails over the years… To avoid any icing or cake mishap, here are a few beginner tips. As they say, practice makes perfect!Tips for frosting a cake:
Grease and flour your cake pans using shortening and all-purpose flour. Using your hands, rub the shortening all over the pan, making sure to cover every corner. If you don't want your hands to get greasy, use a ziplock bag to spread the shortening. Then sprinkle a couple of tablespoons of flour into the pan and dust it around to cover all the areas, then dust the excess into the next greased pan. This makes for easy removal and no broken cake layers.
Let your cakes cool in the pan about 10 minutes, and then gently remove them and place them on a cooling rack to complete cooling.
NEVER frost a warm cake! I have learned this the hard way and it will most often, if not always, end in a disaster...
Wrap layers in plastic wrap and place in the freezer for a few hours or weeks, depending on when you need the cake. This makes the layers much sturdier and easier to frost and stack.
Using a sharp serrated knife, shave the tops of the cakes off if they aren't flat.
Use an offset spatula. I love THIS ONE.
Use a turntable and place your cake board on top of it. I love THIS ONE.
If you're wanting to transport your cake, use a plastic/cardboard cake board that is about 2 inches bigger than your actual cake. Place a small amount of buttercream in the center of your board or cake stand to act as a glue, keeping the cake in place and to avoid any sliding.
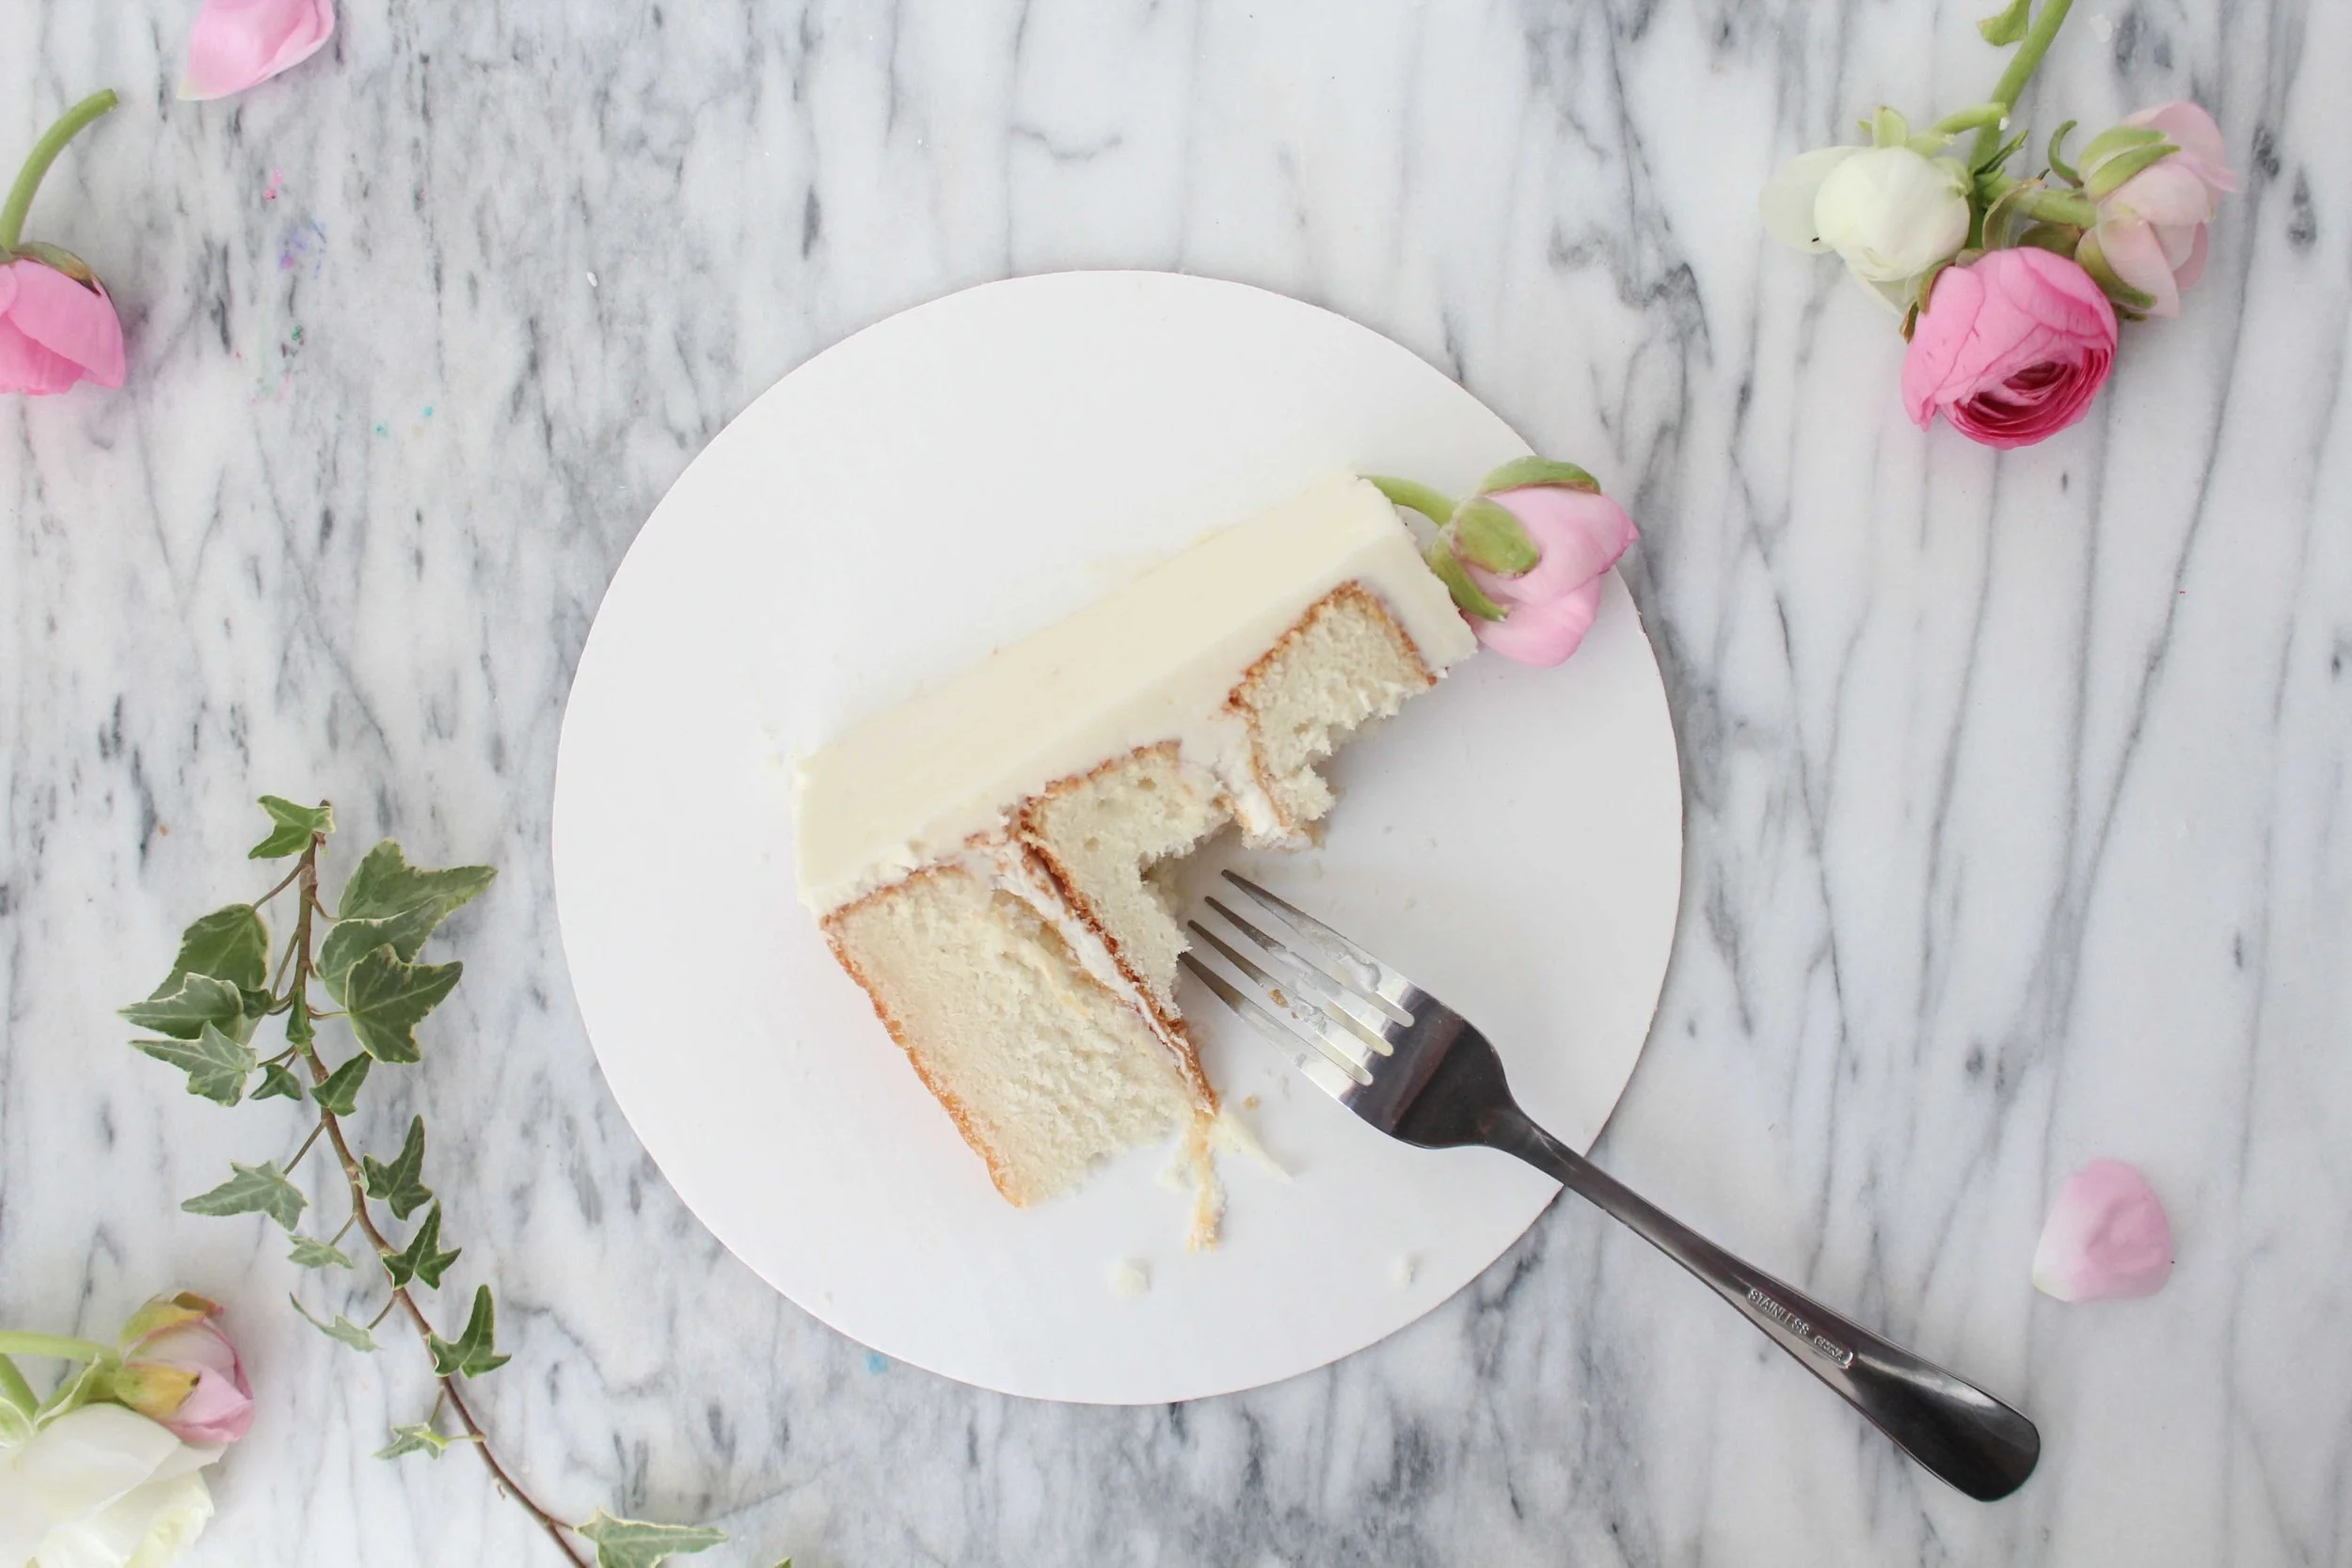
Place your first layer flat on the board. Add a large dollop of buttercream to the center of the layer, and spread it around using your offset spatula. Repeat for the second layer.
For the top layer of your cake, place it upside down so the bottom is at the top. This will ensure a flat cake.
Crumb coat your cake to avoid any crumbs in your pretty white icing. To do this, spread a thin layer of frosting over the entire cake, using THIS TOOL to smooth it. Place in the refrigerator until the frosting has completely hardened, then spread a thicker layer of buttercream over the entire cake.
Turn your turntable while frosting your cake to ensure that it is even.
If you're going for a naked cake or semi-naked cake, use the scraper and don't repeat the second layer of icing.
To create a rustic look, use your offset spatula to create waves or texture to the cake. To keep it perfectly smooth, use the icing scraper.
To create a border, use a PIPING BAG fitted with a large STAR TIP. Cut a small amount off the bottom of your piping bag and place the tip in it, making sure the hole is large enough for the star tip but not too big where the entire tip will fall through. Clear as mud?
If you plan on transporting it, store in the refrigerator. It will transport better if the frosting is cool! Serve at room temperature.
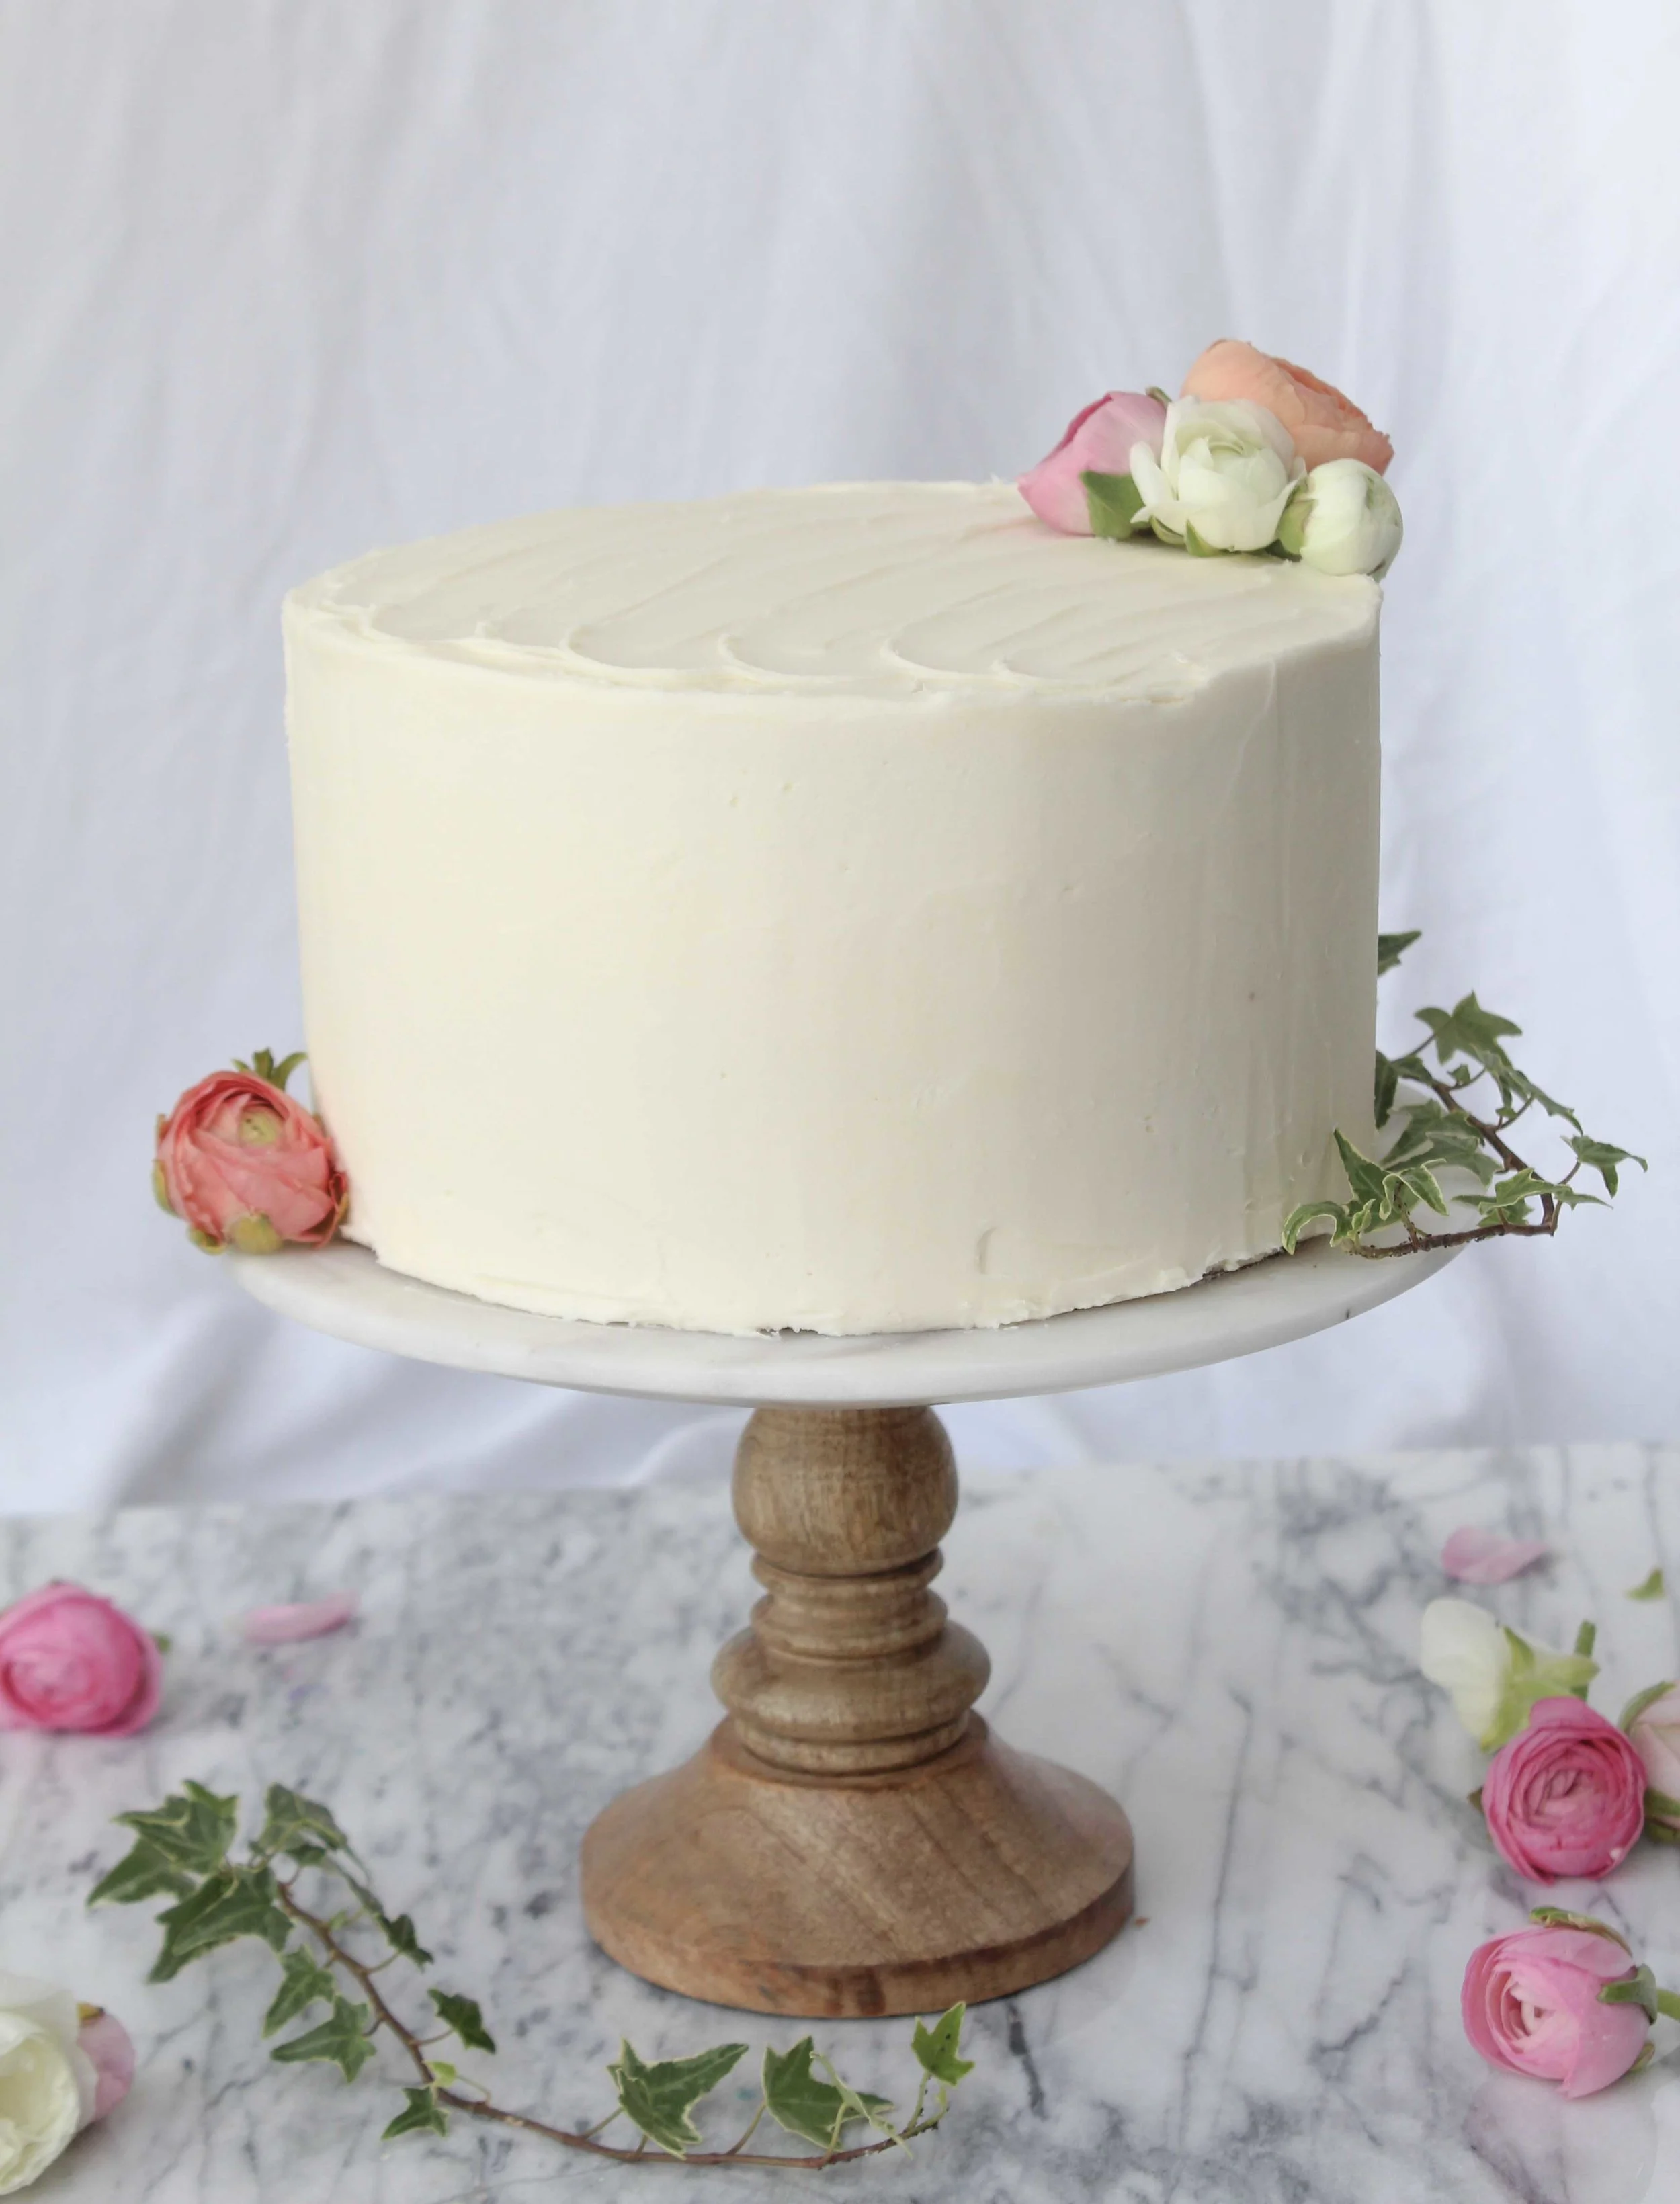
I hope these tips put you at ease and help you create the perfect vanilla cake!
The Perfect Vanilla Cake
ingredients:
- 1 1/2 cups unsalted butter (3 sticks), softened
- 2 1/4 cups sugar
- 4 egg whites, room temperature
- 3 teaspoons vanilla extract
- 1/2 teaspoon almond extract
- 3 cups all-purpose flour
- 1 teaspoon salt
- 1/4 teaspoon baking soda
- 2 3/4 teaspoons baking powder
- 1 1/2 cups whole milk, room temperature
- 3 sticks unsalted butter, softened
- 2 boxes confectioners sugar (32 oz)
- 4 tablespoons heavy cream
- Pinch of salt
- 1 teaspoon vanilla extract
instructions:
How to cook The Perfect Vanilla Cake
- Preheat oven to 350°F. Grease and flour three, 8″ cake pans using shortening and flour (tips on this process up top).
- In a mixing bowl fitted with a paddle attachment, cream butter and sugar together for 2 minutes. The butter will be light and fluffy. Scrape down the sides of the bowl.
- Add egg whites, vanilla and almond extract, beating for 1 minute, no more or your egg whites will change the consistency of the batter.
- In a medium sized bowl, whisk together the flour, salt, baking soda and baking powder.
- Add about one third of the flour to the butter mixture and beat until incorporated, then scrape down the sides of the bowl.
- Add about half of the milk to the batter and beat until incorporated, then scrape down the sides of the bowl.
- Continue alternating the flour and milk, ending with the flour mixture. Do not overmix.
- Divide the batter into the three greased pans and bake for 20-30 minutes, or until lightly browned and a toothpick comes out clean.
- Cool in pans for 1o minutes and then on a cooling rack until completely cooled.
- In a mixing bowl, cream butter on medium high speed for about 3 minutes, making it light and fluffy. Add vanilla extract and mix until combined.
- Slowly add 1/3 of the confectioners sugar, alternating with heavy cream. If the buttercream is too thin, add more confectioners sugar, and vice versa. Add in a pinch of salt. Beat on medium speed for about 1 minute.
- Frost the cake according to the tips above and enjoy!


